Tuesday, September 27, 2016

Strip Coaster


Fabric:
     (20) 1 1/2" x 2 1/2" strips of Background fabric
     (5) 1 1/2" x 3 1/2" strips of 4 Main fabrics
     (1) 5" square of each 4 Main fabrics (Backing Squares)
     (4) 5" squares of flannel or light batting (pre-wash flannel)


Use a 1/4" seam allowance unless otherwise stated.

Step 1:
Right-sides together stitch one main fabric to one background fabric on the short side.  Do this for all 20 pieces.


Step 2:
Now stitch the opposite short sides together to form a tube.


It may seem a little weird if you've never used this technique before, but It will work out!


When you are done your tubes should look like this.


Step 3:
Now randomly snip the background fabric of your tubes so that they can open up and lie flat.
Tip 1: Use a steady hand so your fabric is straight and you don't have to trim off later -making a smaller coaster.
Tip 2: Cut at least 3/8" away from a seam line that way the background shows after the coaster is made.


Step 4:
Press your tubes open so they are strips.  Press towards the dark.


Step 5:
(Missing Picture) Arrange your strips in 4 sets of five and stitch the strips in each set together to form 4 rectangles. (Should look like the right square in step 6 picture.)

Step 6:
Square up our rectangles to be 5" square. (This will require cutting about 1/4" off each first and last strip.)


Step 7:
Create your coaster sandwiches by placing your backing square and coaster top right-sides together, and then placing your flannel square on top of those.  Stitch around all sides leaving an opening for turning at the bottom. Do this for all 4 sets.


Step 8:
Clip all your corners and turn the coasters right-side out so that the flannel is on the inside. Press flat with the seam allowance from the opening tucked in.  Then using a smaller seam allowance top-stitch near the edge of each coaster to close it.


Sunday, September 11, 2016

A frightfully good time for Mayhem

Hello Mayhem Makers

I am going to guest blog today for Quilting Mayhem. For those of you who have had the pleasure of shopping in person at Quilting Mayhem might know me, Katie. I love Halloween! It is my favorite time of the year. The weather is changing and the crisp, cool air nips at your face in the morning. The smell of a wood burning fireplace mixes in with the breeze. It is perfect quilting weather! I have always had a thing for fall weather and Halloween. I wanted to share with you my recipe for Brains! Red Velvet cookie Brains, that is.

Gather your ingredients:

One Box Red Velvet Cake Mix
Two Eggs
One teaspoon Vanilla Extract
1/3 of a cup of Butter melted
1 1/2 cups of Powdered Sugar (set aside)


Open the boxed cake mix and place in the bowl.

Use a whisk to break up any clumps in the cake mix.

Add eggs to the slightly cooled melted butter and whisk together adding the vanilla just after combined. 


 Add butter, eggs and vanilla mixture to the cake.


 Fold in mixture until just combined. You do not want to over mix.


In a separate dish like this one. Smallish and shallow add the powdered sugar. You could do this step in a plastic bag to shake coat the cookies. I find that I prefer to roll them in the dish for extra sugar coating.


If you have a small cookie scoop that would be helpful but I just used a small single spoon. Roll the cookie dough into an approximate 1" long by 1/2" roll.


Roll in powdered sugar until well coated.


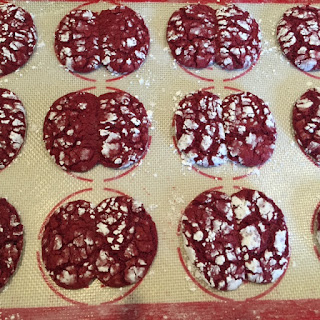
This is a picture of my first batch. I didn't space them far enough apart for the brain hemispheres to show up after baking. Make sure to space the rolls at least 1/2" apart.


 Yummy, yummy brains fresh from the oven.
Let cool for a few minutes before removing from cookie sheet to a cooling rack.

I hope you enjoy.

If you are in Snohomish, WA on Saturday September 17th, 2016 for the Zombie Walk. Please stop in to say hi in your finest zombie attire.

Tuesday, September 6, 2016

Composition Notebook Cover Free Pattern

In honor of Self-Improvement month we've made you a free pattern!


This simple pattern allows you to customize your composition books. What better way to improve yourself than to give yourself a pretty, creative place to keep your ideas, dreams and thoughts!

You can also use the pattern to make fun gifts for your friends in family!